Pages

Steak Soft Tacos


This is hubby's favorite. Considering he grew up in San Diego surrounded by great taco shops and stands, it's a real compliment. This is my version that I adapted from a Cook's Illustrated recipe. It seems like a lot of prep, and it is, but spread out over a few steps.


You'll need
    1  flank steak or skirt steak, flat iron,  (about 1 1/2 lbs), sliced lengthwise then make diagonal cuts.We'll have another chance to cut against the grain later.
I should be cutting against the grain here, but it's OK this recipe is very forgiving. 


Dry marinade
    1 Tbsp chili powder  (grind dried pods for the most authentic flavor)
    1 Tsp ground cumin
    1 1/2 Tsp ground coriander
    salt & pepper

    4 cloves crushed garlic
    1 jalapeno seeded and de-veined and minced (important, this is not a spicy dish, you want the flavor to come
            through, not a bunch of heat. If you like it spicy wait and use a condiment on you taco :)


(YES that is the famous infomercial Magic Bullet! It is the best and noisiest kitchen gadget I own, seriously! I use it for everything from making baby food, to bread crumbs, smoothies to ground spices. Its the perfect size when you don't need the large capacity of a food processor or blender. I LOVE IT)

 In a medium bowl toss the sliced meat with the spices, then add the garlic and jalapeno and toss some more.
Chill 1 hour or all day.

Heat 1-2 Tbsp of oil in a heavy (preferably cast iron) skillet, sear meat in batches
 over med-hi heat one minute per side. You want a deep brown sear on the outside,  still red/pink inside, it will finish cooking in the next step. ( if you overcrowd the pan, it will cool down and the meat will simmer instead of sear, the lack of flavor is evidenced by the pallor of the meat...eewww, grey and flaccid)

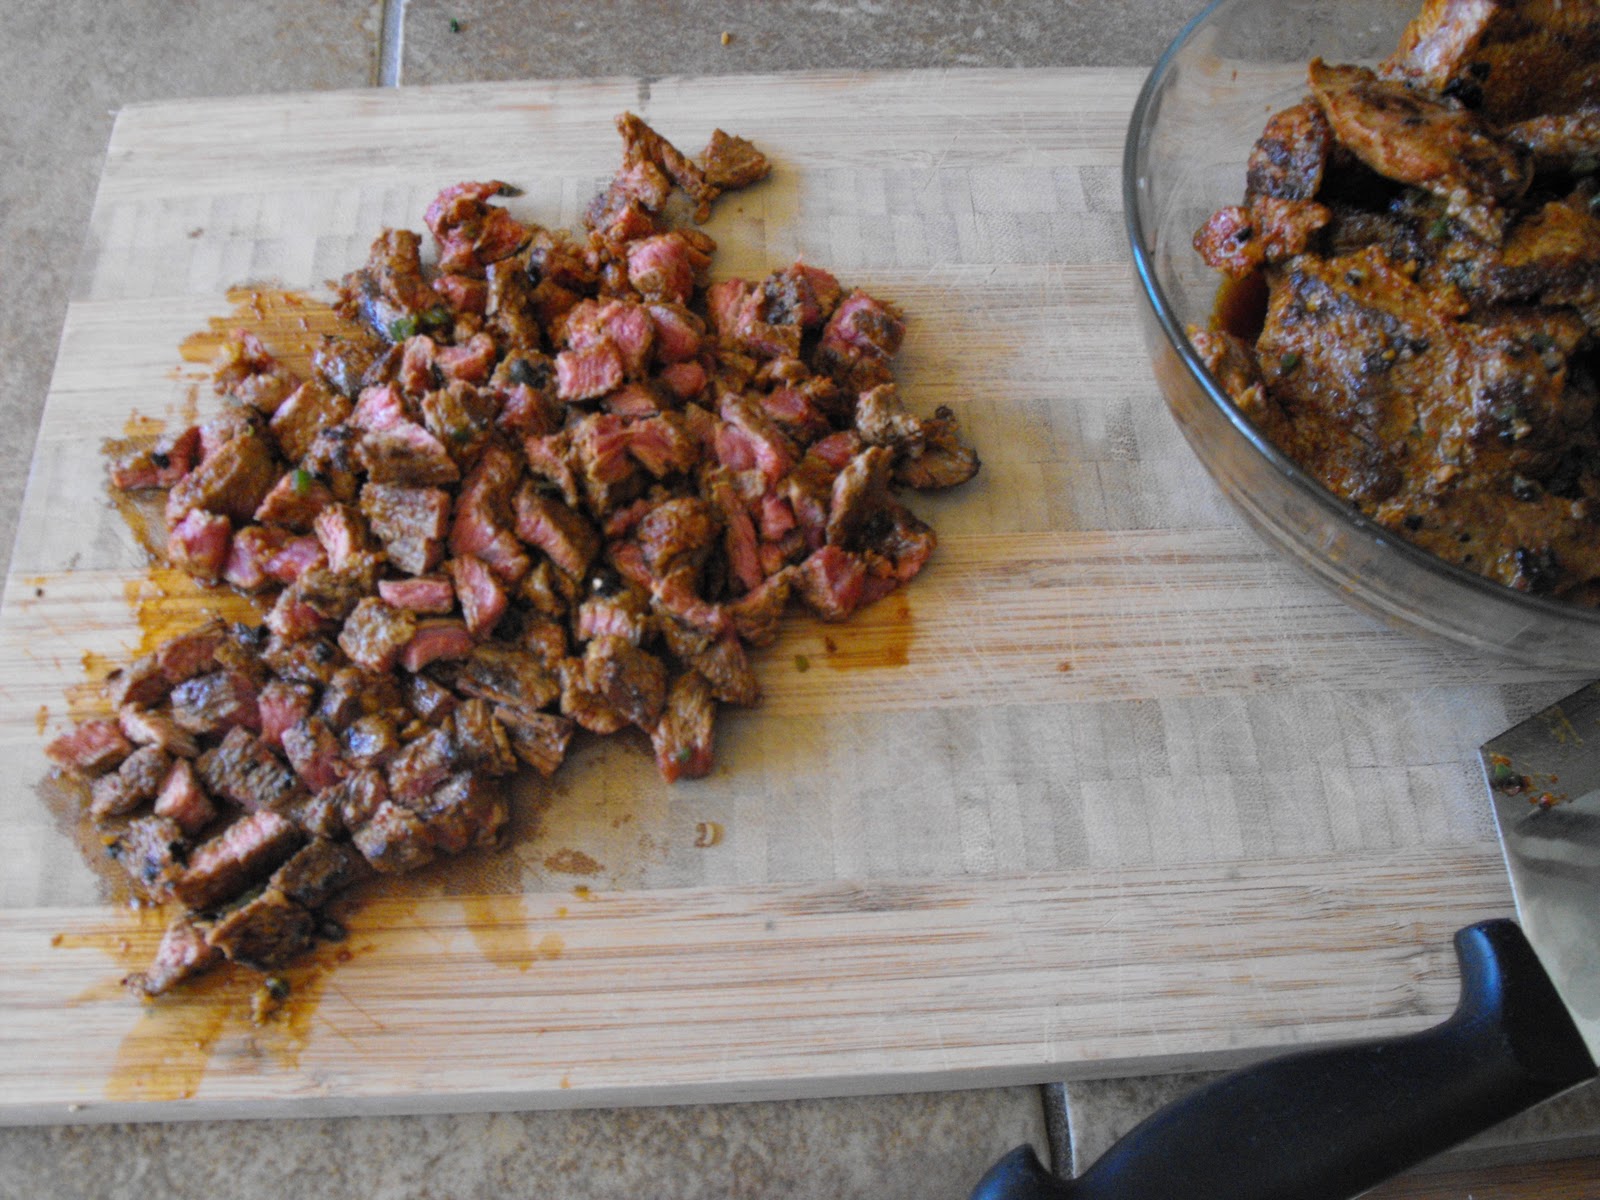
Transfer the meat to a bowl. Roughly chop the meat into uniform chunks, against the grain, careful to save the juices accumulating in the bowl. This makes the pieces tender to the tooth.

Take the skillet off the heat and add
 1/4 cup of tomato sauce
    Juice of 1 lime
    1/2 cup orange juice
    2 shakes of soy sauce
    4 shakes of worchestershire sauce
    the chopped meat and juices


Put skillet back over medium heat, and bring to a simmer and cook until sauce
reduces. It should be wet but not swimming around.

The meat is still coated in sauce but not swimming
Now the meat is perfectly cooked and SO flavorful. Place in a serving bowl.
Bring out the garnishes!

This is part of the fun, everyone chooses their favorite toppings.
I love a little onion, just meat and cheese for Big Brother S, no cilantro for Hubby.
For a crowd, we use decorative dishes. Here is just a Tuesday night dinner for the family.
and sour cream 


     taco sized corn or flour tortillas, heated, kept warm (we really prefer corn for these)
    diced jalapenos
    crumbled cotija or queso fresco (fresh mexican mild cheese)
    chopped fresh cilantro
    diced onion
    fresh made guacamole
    lime wedges

It's so fresh and delicious. We have served this many times and it always  comes out perfect. A great buffet style meal for a summer gathering with the neighbors or for us, a regular weeknight treat.

Analog Angry Birds

 Imitation is the greatest form of flattery,  right?


Early one recent Saturday Morning, I  came across this from the Brassy Apple, while sipping coffee. I jumped up, grabbed Big Bro's hand and a couple Subway Kids meal Bags, and headed down the street and into the field. I'm not exaggerating, I knew Big Brother was going to love every bit of it. We collected a few dozen rounded rocks in specific sizes. Smallest for Split It, larger for piggies and Speed is the Essence ( or as Big Brother reads it "speed the energy") and so on.

We pulled out some newspaper and acrylic paint. We had a lot of fun painting these guys.

We made an early lunch and let them dry.


Using some old wooden blocks, we tossed our unhappy feathered friends by hand. Big Brother and Little sister spent most of the afternoon throwing rocks at blocks.


It's pretty true to the original version, those little blue guys are too wimpy by themselves, you have to throw all three at once and the red Big Brother is very powerful.

Set up, knock down. Pretty simple.

By far the best craft we tried ALL SUMMER!!!

Wait it gets even better...


First thing Sunday morning, before it got too hot, we set out for the field again. This uptime were in the market do a forked branch. we found the most perfect dried branch, baked in the sun, bark already peeling off. Layer it across the top of the stroller an headed home.
A hack saw (mine, the one I keep under the sink with my other tools) and a sanding block was all we needed to whip up one of these guys.


My poor, deprived son, 6 years old and never built or used a slingshot before. Some rubber bands and a piece of old rubber from the toolbox liner.


TaDah!
I have never seen more beautiful markings on a homemade slingshot, isn't it perfect?
What a beauty.
The icing on the cake.

We took some practice shots in the field to get the hang of it before retreating to the shady back patio.
Just pure fun!

This would be a perfect activity for an Angry Birds Party. Thank You Brassy Apple!


mini marshmallow shooter


We were at the county fair last weekend and saw boys walking around with these. Then we saw the ridiculous price when we passed the booth selling them. Clearly we were going to make these our. $4 in materials from the plumbing section ( not including the mini mallows already in the pantry )

I found simple instructions on this cub scout web page.

All you need is:
24 inches of PVC pipe 1/2inch diameter pipe
2 end caps
2 "T"'s
2 90 degree elbows
mini mashmallows
*NOTE*
We had a bag of store brand mini marshmallows, and they were actually different sizes. some were too skinny to make a tight fit in the barrel and some were too thick and got stuck. We found the "name brand" variety had uniform perfect little pluggers.

using a tape measure or ruler, mark off six 3 inch sections. the remaining length is the 6 inch barrel. cut with the hack saw. Scrape out any shavings inside the
pipe. fit together and shoot some marshmallows. Don't glue the pieces together. you can change the combination of fittings form different shape shooters and you need to be able to take it apart to wash it. Sticky and spitty will impair shooting ability.
You could paint them, we chose to keep our stay-puff white.

This will definitely score "coolest mom o the block" points

to use, place a marshmallow in the upper, open end. put that same end up to your lips and give a quich hard blow. The marshmallow will navigate the turns and exit out the long barrel.

I love the "phoooph" sound it makes when the marshmallow ejects.
your son or daughter will think you are the coolest mom on the block.

crochet

Crochet is always in fashion. From baby blankets to hats, doilies and scarfs. Endless possibilities from those few simple stitches. For the past several years, I stayed in the easy blanket comfort zone.


{I love these bold colors and chunky cotton for this pretty petal}

Until one day, a couple years ago. I met the most helpful woman. She had a yarn shop in a big warehouse that was a co-op of women owned businesses. There was a hair salon in one one side, along with a nail technician, an esthetician in the back where you could get a facial. An acupuncturist, a consignment clothing shop that was very funky, rustic style furniture showroom and nestled in the middle was Karen and her yarn shop and espresso. It had wide plank wooden floors and a wood stove in the back. The whole place was pieced together, eclecticly charming. There was a circle of chairs and two women chatting. The walls were lined with shelves of all the imaginable skeins and balls and sample creations of the various yarns.

And so my journey of crochet began to bloom...


These are going to adorn a pillow for Little Sister
The colors are perfect. I must admit this is the most bizarre pattern of yarn. 
These are all crocheted from the same continuous skein. From red to dark pink to white splashed with blue, yellow. I don't know what it's suppose to be for, but the flowers are definitely one of a kind :)


You can find some cute patterns on Skip to my Lou or Attic 24. Also some cute crochet projects on my Pinterest Board.

A not-so-perfect newborn hat in natural unbleached cotton.
Unfolded, it resembles a stocking cap.


I have about four crochet projects going on concurrently some big, some small...something to fit any mood or situation from camping to remedy for sleeplessness.

As you can see, I haven't fully embraced weaving in the loose ends. It is
the very last step step completed before anything is used.

I have made hats and scarfs and lots of blankets.
My newest adventure is in thread crochet, I aspire to make a large pineapple doily, but I'm not quite there yet.

I have some quick and simple holiday creations underway, hopefully I can get some pictures soon  :)

Halloween Treat Bags

These are cute, quick and easy.
Paper, printer, scissors and glue.

Martha Stewart has a fun Halloween line called "Fright Night"
I saw these treat bags and knew I had to make some.
                                                                         Source: marthastewart.com via Cristy on Pinterest


So I popped on over to *The Graphics Fairy* and found so many fantastic Halloween-y graphics, perfect for your vintage halloween projects.
Here are a couple examples, of course you have to go over and see for yourself (if you aren't already a fan), the endless possibilities...
Just print some creepyness on Parchment paper along with some text, fold into an envelope shape (fold in thirds, glue seam in center of back of envelope, fold up the bottom, seal again with glue), trim with Pinking shears and viola`.

I am so excited for Halloween this year, I have a fun decorating theme that I  have been building on over the past couple years and will grow with our family for years to come.
I can't wait to show you in October!

You may also be interested in my post about the {Finger} Food I filled these treat bags with! 

Bargains for Gardens

Top Three Reasons Why Now Is THE Best Time To Plant New Perennials:


#1 More For Your Money
you can get perfectly healthy plants for 50% off or more as nurseries clear inventory for the end of the season (usually it costs more to water and care for them through the winter, than to take a reduced profit (except mild winter climates))

Beautiful Blue Spirea


#2 Head Start on Next Year
the ground is already warm, the scorching hot weather is mostly behind us. That means plants get off to a fast start. Compared to Spring plantings when growth starts out very slow as things warm up and days are still getting longer.

They may look sparse or insignificant now, but just be patient.
I promise it will more than make up for it next year.


#3 Diamonds in the Rough
save even more, buy "uglies" and clearance plants that have been cut back or are leggy (long, spindly or misshapen)  They may not look very attractive now, but the season is nearing an end anyways. Soon the gardens will be dormant, then you cut them back anyways. Chances are these plants have overstayed thie welcome in the current pot they call home.  Room to spread their roots is all they need to return to glory. Next thing you know,  Spring is here. Those uglies sprout new full and lush stems, and bigger too, since they had time to establish in the fall and now are bigger and better than the nurseries Spring stock.


I buy most of my perennials this way. Sure it's hard to restrain myself in the spring. Strolling through the warm bright greenhouses filled with lush greenery, while it's still cold and blowing outside. But I know what late summer bargains await.

For Example, see this butterfly bush, #1 pot size regularly $25 each. Buy three or more only $10 each, mix and match with this blue mist spirea, rose of Sharon and several others.

Georgous Butterfly Bush #5 Pot, $10, Regularly as much as $25
These babies attract Hummingbirds and Butterflies and their scent is sweet, sweet, sweet. I like to think it smells like honey.

Here, lets get close enough to get a good sniff...


Yummy, right?

Purple cone flower,one gallon perrennial normally $8, now just $5 each. That is an awesome price!!!

Disregard the "work in progress" ground conditions like the thin layer of mulch to keep the mud where it belongs, and the tree stakes. Temporary yet necessary.


Our end of season sales are just under way. Check your local greenhouse and nurseries.  (I pass up the big box store plants. Chances are they have been sitting on pallets in parking lots all summer. Stressed beyond hope from getting too dry or too wet. Sales clerks here lack the love and TLC nurseries have for their plants) In some areas it may still be too soon, but keep checking.

 Last year we practically STOLE these trees all for $150 each!!!
this lance leaf poplar was 18 feet tall and the trunk is 6 caliper inches. many deciduous tree sold by the caliper inch, usually average $100 per inch.


This seedless, thornless honey locust, almost 20 feet tall ( we transported them in our 16 foot long trailer. the tops of the trees overhung about 10 feet( because of the root ball ) it was not ideal but you couldn't beat the price!!!

To give you an idea of how big this guy is, that Vanderwolf Pine in the lower right hand corner is about 5' tall.


Since we haven't reached the one year anniversary in our new house yet, we still have lots more landscaping to do.

10 foot tall Bosnian pines 2 for $300. I was only able to find 5-6 foot tall one for $200 each.


We are saving so much money and hopefully will recieve a Yard of the Week award in a few years!!!

You might also be interested in some of my other Gardening Posts

iGrow ~you can, too~ No.6 Bulbs

Fall Bulbs
Now is the time to plant for the first flowers or Spring
I know it's not easy to think of Winter around the corner and Spring even farther still.
Bulbs help me get over what can seem like never ending cold.
Because we can get 8 inches of this white stuff here, even in May!


Buy them now.
Wait at least until Halloween to plant!

The best time to plant is after Halloween and before the ground freezes. 

Milder climates should be planted no later than January to ensure enough time for the bulbs to chill (no less than 6 weeks) If you plant too early, the ground may be too warm still, the bulbs may be fooled into thinking they need to sprout. Of course it's not Spring and when it does get cold they will just die, having awakened from their sleep and started to grow, they send out some shoots and roots. But they can't complete the cycle of flowering and growing new bulbs. So don't plant until the ground has cooled.


How to Plant

Dig a hole, a good rule of thumb is twice  as deep as the bulb is tall. Muscari 1 inch deep, Daffodil 5 inches deep. (Meaning the TOP of the bulb is 1, or 5, inches below the surface)

Add a teaspoon of bone meal (long lasting fertilizer) to the bottom of the hole. I actually use a designated kitchen spoon for this. Scrape the granules into the dirt a bit.
Set your bulb in the hole, pointy side up.

    Backfill in with dirt. If you have normal topsoil or garden soil, just fill the hole in with the dirt you dug out.  *However* If you are planting these in an out of the way place that has very rocky, dense clay or otherwise harsh soil conditions. Fill the hole back in with some "better" soil. Bulbs shoot up through the earth, but if the ground is too hard, like the clay and adobe around here, you may end up disappointed.


      You may skip the fertilizer, but remember this is your only opportunity to give these guys a good home. Most common bulbs come back year, after year, after year. So put in that little extra effort now.

      Tips for Naturalizing

      • Plant in groups. I dig a very large hole for Daffodils and put in 5-7 bulbs about 2 inches apart.

      • Plant an odd number of bulbs together. Even numbers look planned and mathematical. (unless you have a dozen or more)
      Plant in unexpected places! I toss Crocus corms onto the lawn by the handful. Using a screwdriver, wiggle little holes into the lawn about an inch and a half deep. Stick the little crocus in. They flower and die back long before you need to mow and are so cute and unexpected.Also, they usually don't return the next year because the grass gets too much water, but are very inexpensive, I use them as an annual in this application.

      Oh, Deer! 


      These beauties above are pretty safe from those garden nibblers, including the big beautiful yellow Daffodils (not pictured) we all know so well.
      {These are pictures from the packages of bulbs, I just planted, forgive the "staples" please.}
      • Deer Love Tulips! Just don't plant them where deer have access to avoid tears.

      • Deer won't touch Daffodils or Narcissus or Jonquils (all in the same family)

      • They also avoid Crocus, Allium, Muscari, 

      Bulbs are probably the single most gratifying planting experience. Take some hard, homely, papery skin covered bulbs. Dig a hole and drop them in with a spoonful or bone meal in the fall. Keep moist (this is kinda important). If you live in an area that gets little winter moisture or if your ground is NOT covered with snow for a few months. Get out there at least once a month and pour some water over those patches of earth above your little bulbs of soon to be spring joy. When the spring sun warms the soil,'those beauties will sprout. You can have large beautiful blooms (almost guaranteed) with very little effort. Tulips, Daffodils, and crocus, Grape Hyacinth (Muscari), and true Hyacinth are the first five to consider. Bulbs can be pricey. Try Home Depot or Lowe's bags of bulbs at a significant discount compared to your local nursery.  Beware, you get what you pay for here. I have found that only as much as 50% of bulk bulbs come up in the spring compared to 99.9% of the pricier, nursery bought bulbs.


      I am not a professional, these a just my opinions. What works for me, may not work for you.

      Easy to grow if you dig a hole bigger than the pot, add a handful or two of some compost. Fill the hole with water, put the plant in and backfill around the plant with the original soil mixed with a couple more handfuls of compost. Water it every day for the first two weeks, then about three times amweek the first year to establish the roots.
      4-8 hours of sun or more and water regularly (2-3 times a week) should be all you need to grow successful plants.

      iGrow ~and you can,too~ No. 5 Sage

      Sage {Salvia officinalis}

      A wonderful foundation planting since it is evergreen in some areas (not mine) and comes in three different colors. Not to mention it's place in the kitchen every Thanksgiving.

      Grey/green
      Very small  plant, from a six pack, planted last fall
      Even this small you can see the blue/purple flowers

      Bicolor
      very interesting foliage
      4" pot planted last fall

      and Tricolor
      Poor thing, almost a goner, trampled while planting a pear tree.
      green, cream and purple leaves

      The do grow to about 2 feet by 2 feet with woody stems. Wildlife leave them alone unless desperate. Again I've never had any issues with pests on any of my perrenial herb plants. These pair nicely with many other plants due to their pretty foliage. The also have upright blue/purple flowers that attract bees.

      Later this summer when these guys get bigger, I'll update some pictures or click here for tricolor sage (most comprehensive herb source online, that i have found) 

      I am not a professional, these a just my opinions. What works for me, may not work for you.

      Easy to grow if you dig a hole bigger than the pot, add a handful or two of some compost. Fill the hole with water, put the plant in and backfill around the plant with the original soil mixed with a couple more handfuls of compost. Water it every day for the first two weeks, then about three times amweek the first year to establish the roots.
      4-8 hours of sun or more and water regularly (2-3 times a week) should be all you need to grow successful plants.